Natural Easter Egg Dyes Using Foods & Spices
16. March 2018
When I was a kid, we didn’t use Paas to color Easter eggs. I mean it was around, I’m not THAT old! We opted to use what my Polish grandma used as a girl: Beets, greens, tea, and the ever-popular onion skins. Ditch the Dyes and Color Eggs the Way Grandma Did!
Not that store-bought tablets are bad or harmful for you per se. Most if not all egg coloring kits on the market today are FDA approved, and the dyes are all food-grade (i.e., safe to eat). But there is something wonderful about forgoing “Red Dye 40” or “M&M Green.” I prefer to embrace the random nature of letting a natural food or spice decide my egg’s fate*
*note, that should be “color fate.” Their “ultimate fate”, or final destination, will be the same as every poor egg that enters my abode: in my tummy. Yeah that’s right, I don’t share any eggs with my husband. Life’s tough that way.
I labeled my eggs with our Mandala canning labels so I knew which dye was used.
I decided to hard boil my eggs in advance, then add them to the dyes once cooled. Since I had brown and white eggs, I decided to give both a try. For my color pallet, I went with some traditionals as well as options that my grandma never used. I tried onion skins, blueberries, turmeric, paprika, red rooibos tea leaves, coffee, spinach and dandelion greens, and pickled beets. The onion skins were the only one of these that I boiled to release the pigment. I stuffed a pot full of onion skins, added 4 cups of water, and 3 tablespoons of white vinegar. I let this simmer covered for 30 minutes, then strained once cool. I steeped the other foods and spices in mason jars with boiling water and a little vinegar for 30 minutes. I used the new Ball mason jars since they have handy measurements on the side. About 1 cup of water is enough to cover the eggs. Once cooled, I added the hard-boiled eggs and soaked overnight in the refrigerator.
Next up, decorations! I gathered plant leaves, rubber bands, raffia ribbon, electrical tape, and even strawberry foliage. Wrapping leaves and ribbon around the hard-boiled eggs was the trickiest part. Adding a little water to the egg helped the leaves stick in place. Thinner leaves seemed to stick flat to the egg much better than bulky leaves. I pre-cut nylon hose in 5 inch pieces with one end already tied in a knot. As carefully as possible, I placed the leaf-covered egg inside the nylon. Then I knotted the other end tightly, cinching the decorations closely to the egg. For one egg, I lined cheesecloth with boiled onion skins and foliage, then tied it into a bunch. I drew swirls with a white crayon on a few other eggs. Then on another, I applied heart decals that I cut out of black electrical tape.
I carefully placed one egg in each mason jar filled with cooled dye. Since I hoped for the most vibrant eggs possible, I let them soak overnight in the fridge. The next morning I felt like a kid unwrapping Christmas presents on Easter! I could hardly wait to see how the eggs turned out. And I was pleasantly surprised with some of the results.
Of all the natural dyes, I expected the least out of the spinach and dandelion greens. I didn’t have much spinach on hand, so I went foraging for dandelions in my backyard. This was easier said than done considering that we just had a snow storm! But alas, I found several handfuls of dandelion greens to supplement my spinach. The resulting liquid didn’t seem very concentrated in color though. My grandma used spinach to color her eggs, so I knew what to expect. Yet I was surprised that the egg dyed as well as it did considering how diluted the dye looked. I feel like I may have cheated on this one a little though. I wrapped the egg in green raffia ribbon, so some of the coloring from the ribbon transferred to the egg. And Bob Ross would call that a "Happy Accident"!
To be honest, I was disappointed and surprised the beet-colored eggs weren’t more intense. I skimped out and used a jar of pickled beets for the coloring. So perhaps if I had boiled a raw beet, the results would be a more intense color instead of tan. I drew swirls with white crayon on one egg before adding to the beet dye. So the end result was still a pleasant and subtle white and taupe colored egg. The blueberry egg probably would have been more vibrant, but I was pretty stingy with the fruit. I only used about 1/4 cup of berries for a cup of water. Other recipes I saw called for a 50/50 ratio. I used the top of a strawberry for this one, so the final egg looks flowery. I also recycled used coffee grounds for the coffee dye. Usually my morning coffee resembles (and tastes) like burnt wood. I want to feel like someone smacked me in the face with a charred campfire log when I drink my morning wake-up juice! At any rate, I could see through the coffee solution, thus it was too weak. But I still thought the subtle coloring was nice.
The spice-colored eggs were my favorite. I wrapped these in leaves from a dead potted plant that’s been on my back porch for half a year. I just KNEW I’d have a use for that plant one day, ha ha! Both turmeric colored eggs soaked the same amount of time. Yet one was more intense looking than the other. I didn’t measure the turmeric when I added to the jars, so I imagine one had more spice than the other. The paprika egg turned out eggcellent! The color was intense considering I only used about 1/2 teaspoon of paprika.

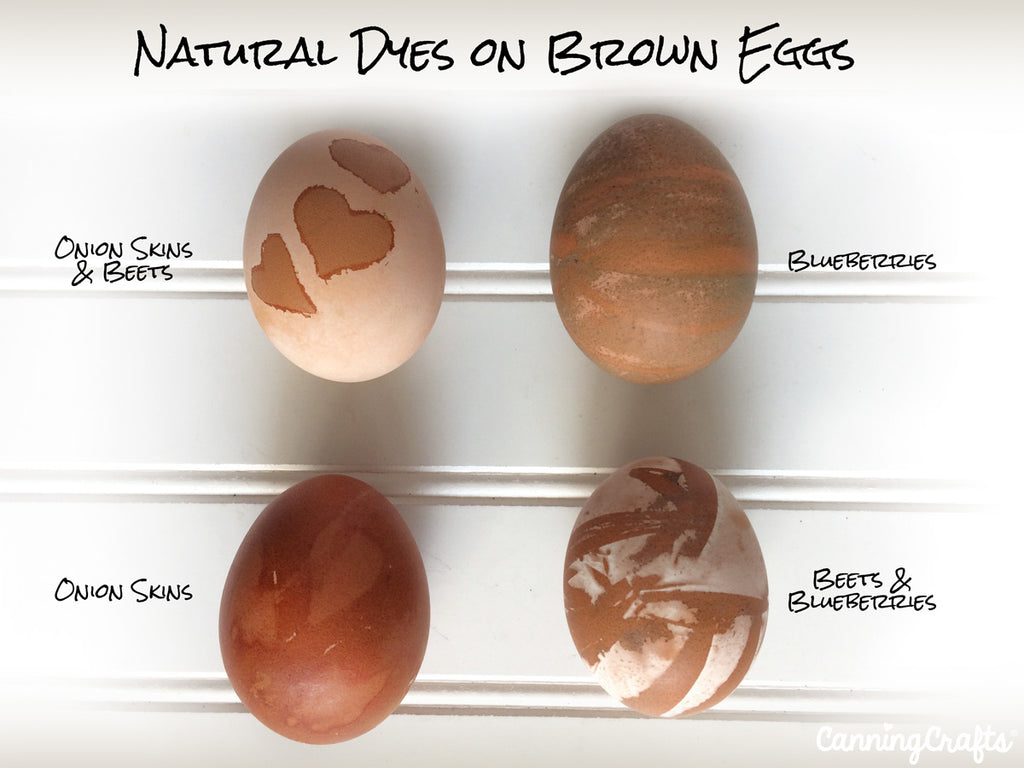
I used mostly white eggs, but threw in four brown eggs to see how they’d look dyed. I put the brown eggs in the dye solutions that I thought would be the darkest. So my expectation was that there would be a brown on darker brown look. But to my complete surprise, a few of the dyes actually removed the original brown coating from the eggs! I soaked the egg with black heart decals in onion and beet dye. I assumed removing the decals would reveal the original brown with darker tones around the hearts. But most of the original brown shell had washed off! So the final egg was the opposite of what I thought it would be. The same effect happened with the brown egg dyed in beets and blueberries. The brown egg dyed in onion skins turned out as I expected, with darker browns outside of where I placed the leaves. Originally, I soaked a brown egg wrapped in rubber bands in red rooibos tea. The tea dye wasn’t concentrated enough to color the brown egg. So I decided to plop it in the blueberry dye the next morning. The end result was a subtle-striped egg.
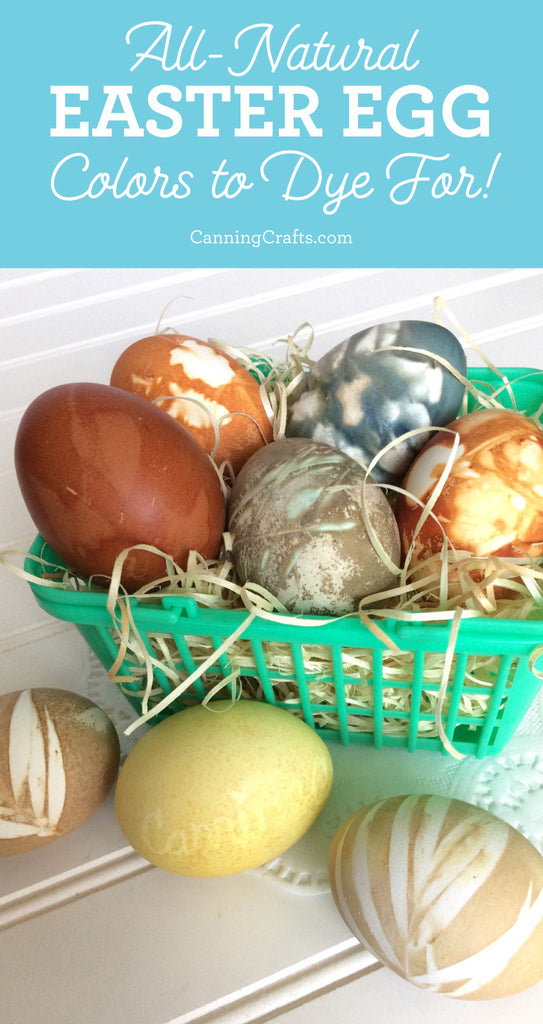
Clockwise from top: Blueberries, turmeric, beets & blueberries on a brown egg
Clockwise from top right: coffee, onion skin dye in nylon, egg wrapped with onion skin in cheesecloth
Clockwise from top right: Coffee, beets with white crayon, beets with leaves
You know what to expect when you dunk an Easter egg in a store-bought dye. That’s what makes natural-dyed eggs so much fun. You never know what the end result will be until you unwrap your eggs.


Do you color your eggs with natural food dyes? Do you have a favorite food dye solution?


